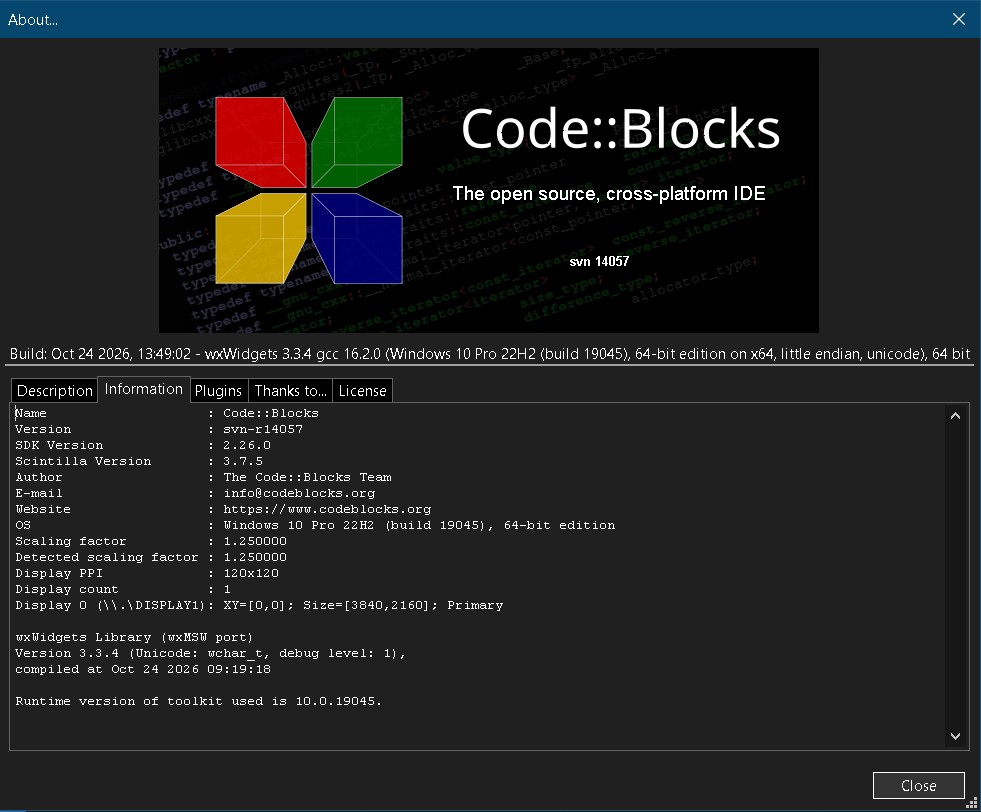
How to Build Code::Blocks SVN 14057 with GCC 16.2.0 and wxWidgets 3.3.4 — and Fix User Project Templates
This guide documents the steps I used to build Code::Blocks SVN revision 14057 on Windows and fix a bug that caused user-defined project templates to create directories instead of files.
The goal is to have a working development environment that can be reproduced later without having to rediscover all the configuration details.
1. The Problem: User Project Templates Create Directories Instead of Files
When creating a new project from a user-defined template, Code::Blocks did not copy the template files correctly.
For example, instead of creating:
MyProject/
├── main.cpp
└── MyProject.cbp
it created directories named after the files:
MyProject/
├── main.cpp/
└── MyProject.cbp/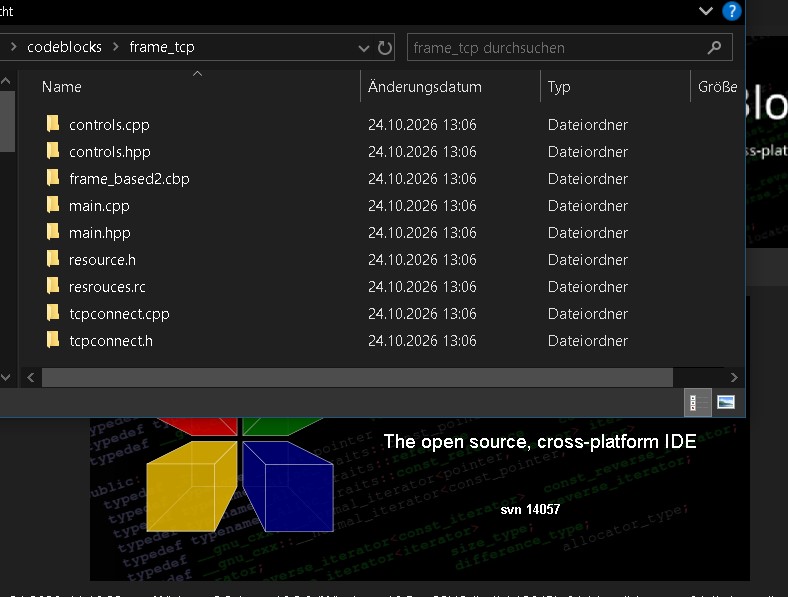
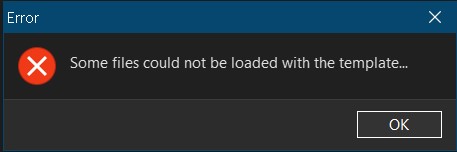
Rebuilding Code::Blocks alone did not fix the problem. The cause was in the SDK source code responsible for creating projects from user templates.
The relevant source file is:
src/sdk/templatemanager.cppThe function to inspect is:
TemplateManager::NewProjectFromUserTemplate()We will return to this bug after setting up the build environment.
2. Download the Required Software
2.1 GCC 16.2.0 and MinGW-w64
Download GCC from the WinLibs project:
For the configuration used here, select the 64-bit GCC 16.2.0 toolchain with:
- UCRT runtime
- POSIX threads
- SEH exception handling
The corresponding WinLibs archive was extracted to:
D:\mingw\gcc16The compiler executables are in:
D:\mingw\gcc16\binYou do not need a conventional Windows installer. Extract the archive into the desired directory.
2.2 wxWidgets 3.3.4
Official download page:
For a source build, download the Windows source archive for wxWidgets 3.3.4. The official release information is also available here:
https://github.com/wxWidgets/wxWidgets/releases/tag/v3.3.4
wxMSW-3.3.4_gcc1620_x64_Dev.7z
Important: Do not use GitHub’s automatically generated “Source code” archive for a source build if the wxWidgets release instructions specify the dedicated Windows source archive. The dedicated archive includes the necessary sources and submodules.
Extract wxWidgets so that the resulting source directory is:
D:\wx\3.3.42.3 Code::Blocks SVN source code
The Code::Blocks SVN repository is available here:
http://svn.code.sf.net/p/codeblocks/code/trunk/
The source directory used in this guide is:
C:\CodeBlocks\14057\srcThis guide refers to SVN revision 14057. If you use a different revision, the source code and build instructions may differ.
3. Verify the Compiler Installation
Open a Windows Command Prompt.
Temporarily add the compiler directory to PATH:
set PATH=D:\mingw\gcc16\bin;%PATH%Check the installed versions:
g++ --version
gcc --version
mingw32-make --version
The compiler should report GCC 16.2.0.
If Windows reports that a command cannot be found, check the extracted directory structure. The executables must exist in:
D:\mingw\gcc16\binMake sure that Code::Blocks uses this same compiler installation.
4. Build wxWidgets 3.3.4
4.1 Open the correct directory
The GCC makefile is named:
makefile.gccIn a Command Prompt, navigate to the directory containing it. In a typical wxWidgets source tree, this is:
cd /d D:\wx\3.3.4\build\mswCheck that makefile.gcc exists before proceeding. If the source archive uses a different directory layout, adjust the path accordingly.
4.2 Use the correct make command
The command that worked in this environment was:
mingw32-make -f makefile.gcc -j8 SHELL=cmd.exe SHARED=1 MONOLITHIC=1 BUILD=release UNICODE=1The options are:
| Option | Meaning |
|---|---|
-f makefile.gcc | Use the GCC/MinGW makefile. |
-j8 | Allow up to eight parallel build jobs. |
SHELL=cmd.exe | Explicitly use the Windows command interpreter. |
SHARED=1 | Build shared libraries. |
MONOLITHIC=1 | Build the monolithic wxWidgets library. |
BUILD=release | Build the release configuration. |
UNICODE=1 | Enable Unicode support. |
4.3 Why SHELL=cmd.exe matters
The build encountered shell-related problems when GNU Make executed commands.
Explicitly specifying:
SHELL=cmd.exeresolved the problem in this environment.
This is an important detail to remember when reproducing the build on Windows. If make commands fail unexpectedly, check which shell GNU Make is using before investigating unrelated compiler errors.
4.4 Fix the Windows SDK declaration issue
During compilation, an error occurred involving:
SHCreateItemFromParsingNameThe declaration was gated by the _WIN32_IE version setting in the Windows SDK headers.
The configured value was too low:
_WIN32_IE=0x0603The setting used to resolve this particular error was:
_WIN32_IE=0x0700After changing the setting, the build proceeded.
Do not change this macro blindly in every project. Check the relevant Windows SDK header and the actual compiler definitions first. This adjustment was specific to the declaration encountered during this build.
5. Configure Code::Blocks
5.1 Check the compiler
In Code::Blocks, open:
Settings → Compiler → Toolchain executables
Check that the selected compiler points to:
D:\mingw\gcc16\binThe compiler, linker and other toolchain executables should belong to the same installation.
5.2 Check the wxWidgets global variables
Open:
Settings → Global variables
The existing configuration used a global variable named:
wx33_64Check its base directory and all related paths.
The chosen wxWidgets source/build directory is:
D:\wx\3.3.4Avoid mixing paths from different installations, for example:
D:\wx\3.3.4
D:\wx\3.3.4-gcc16
The compiler include paths, library paths and wxWidgets configuration must all refer to the intended build.
5.3 Fix the missing wxWidgets library
The following linker error occurred:
ld.exe: cannot find -lwxmsw33u: No such file or directory
collect2.exe: error: ld returned 1 exit status
The required import library was located in:
D:\wx\3.3.4\lib\gcc_dllThe linker had been given a different library directory.
Correct the settings under the project’s:
Build options → Search directories → Linker
Make sure the active target can find:
D:\wx\3.3.4\lib\gcc_dllThe exact directory depends on the library layout produced by your build.
Remember that a DLL-based build requires the import library during linking. The presence of a DLL alone is not sufficient.
After correcting the paths, clean and rebuild the affected target.
6. Fix the User Template Bug
6.1 Open the source file
Open:
C:\CodeBlocks\14057\src\sdk\templatemanager.cppLocate:
TemplateManager::NewProjectFromUserTemplate()Inspect the code that creates the destination directories and copies the template files.
6.2 Understand the cause
The relevant code used a destination path containing the complete file name.
For example:
C:\Projects\MyProject\main.cppThe problematic logic was equivalent to:
if (!CreateDirRecursively(dst))
    Manager::Get()->GetLogManager()->DebugLog(
        _T("Failed creating directory for ") + dst);

if (wxCopyFile(src, dst, true))
{
    // Continue processing the copied file.
}
The problem is that dst represents the file destination, not just the directory.
Passing this complete path to a directory-creation function can create a directory named main.cpp.
6.3 Correct the code
Replace the problematic block with:
wxFileName dstName(dst);

if (!CreateDirRecursively(dstName.GetPath()))
{
    Manager::Get()->GetLogManager()->DebugLog(
        _T("Failed creating directory for ") + dstName.GetPath());
}

if (wxCopyFile(src, dst, true))
{
    // Continue processing the copied file.
}
The key change is:
dstName.GetPath()This extracts the parent directory from the destination file path.
For example:
Destination file:
C:\Projects\MyProject\main.cpp

Parent directory:
C:\Projects\MyProject
The directory-creation function now creates only the parent directory, and wxCopyFile() copies the actual file.
Check the surrounding function before applying the change. Also inspect other CreateDirRecursively() calls in the same function, but modify only those that incorrectly receive complete file paths.
6.4 Rebuild and test
After editing the source:
- Rebuild the Code::Blocks SDK.
- Rebuild the relevant application components.
- Start the newly built Code::Blocks executable.
- Create a new project from the affected user-defined template.
- Check the resulting project directory.
The expected result is that main.cpp and the other template files are created as files rather than directories.
7. Save the Fix as an SVN Patch
Before submitting the change, inspect the working copy.
Open a Command Prompt:
cd /d C:\CodeBlocks\14057\src
svn status
Check that the intended source file appears as modified:
M sdk/templatemanager.cppCreate a patch on the desktop:
svn diff sdk\templatemanager.cpp > "%USERPROFILE%\Desktop\templatemanager.patch"Review the patch before submitting it.
If you have repository write access, update your working copy, resolve any conflicts and test the change again before committing.
For example:
svn update
svn diff sdk\templatemanager.cpp
svn commit sdk\templatemanager.cpp -m "Fix user template file copying"
If you do not have write access, submit the patch through the project’s accepted contribution process instead.
8. Quick Reference: Commands and Paths
Compiler
D:\mingw\gcc16\binwxWidgets
D:\wx\3.3.4Code::Blocks source
C:\CodeBlocks\14057\srcVerify GCC
g++ --version
gcc --version
mingw32-make --version
Build wxWidgets
Run from the directory containing makefile.gcc:
mingw32-make -f makefile.gcc -j8 SHELL=cmd.exe SHARED=1 MONOLITHIC=1 BUILD=release UNICODE=1Find the template implementation
src/sdk/templatemanager.cppCheck SVN changes
cd /d C:\CodeBlocks\14057\src
svn status
Create the patch
svn diff sdk\templatemanager.cpp > "%USERPROFILE%\Desktop\templatemanager.patch"Final Notes
The most important lesson from this exercise is that a successful build and a correct application are two different things.
The GCC and wxWidgets setup required careful configuration, especially the explicit Windows shell and consistent library paths. But the original template failure was a source-code logic bug: a complete file path was being used where only a directory path should have been supplied.
Correcting that path allowed Code::Blocks to create the directory structure and copy the template files correctly.
Keep this guide together with the patch file. If the same problem occurs again, you can reproduce the build, locate the relevant source function and apply the fix without repeating the entire investigation.